Emergency roof repairs are immediate interventions, including tarping, shingle patching, flashing sealing, and structural stabilization, that stop water intrusion and prevent further structural damage until permanent work can be completed. When a storm tears through Wichita or a falling branch punches through your decking, knowing which repair type fits your situation can mean the difference between a manageable fix and a catastrophic loss. The types of emergency roof repairs available to homeowners range from simple tarp installations costing $200 to major structural patches exceeding $10,000, depending on severity. This guide covers each method in plain terms so you can act fast and act smart.
1. Types of emergency roof repairs: what qualifies as a true emergency
Not every roofing problem is an emergency. True roofing emergencies involve active leaks, water intrusion into living spaces, or imminent structural failure. Missing a few shingles after a windstorm is urgent but not always an emergency. Water dripping near electrical fixtures, however, is a genuine emergency. Water near electrical fixtures requires you to shut off power immediately and call a professional before touching anything. Recognizing this distinction helps you prioritize correctly and avoid overreacting or, worse, underreacting.
2. Emergency tarping: fast waterproof protection
Tarping is the most common and most immediate emergency roof repair method available to homeowners. A properly installed tarp buys you 30 to 90 days of protection while you arrange permanent repairs. The key word is “properly.” A tarp thrown loosely over a damaged section and held down with a few bricks will balloon in Kansas wind and cause more damage than it prevents.
Effective tarps extend at least 4 feet beyond the damaged area in every direction, run from the ridge down to the eaves, and are secured with 2×4 lumber battens screwed into the decking at 16-inch intervals. This batten method distributes wind loads across the entire tarp surface rather than concentrating stress at a few anchor points. Consumer blue tarps degrade within weeks under UV exposure. Heavy-duty polyethylene tarps rated for UV resistance are the correct material choice.
Here is what you need for a proper tarp installation:
- Heavy-duty polyethylene tarp, UV resistant, sized to extend 4 feet past all damage edges
- 2×4 lumber battens cut to tarp width
- Exterior-grade screws, 3 inches minimum length
- Drill or impact driver
- Safety harness and non-slip footwear
Pro Tip: Start the tarp at the ridge and roll it down toward the eaves. This orientation channels water off the roof rather than under the tarp, which is the single most common installation mistake homeowners make.
3. Shingle replacement and patching for isolated damage
Shingle patching is the right emergency roof repair method when damage is confined to a small, clearly defined area, typically fewer than 10 to 15 shingles. If a hail storm has damaged shingles across the entire roof surface, patching individual shingles is not the answer. But when a single branch impact or a localized wind event lifts or cracks a handful of shingles, replacement stops the leak quickly and at low cost.
The patching process follows a clear sequence:
- Slide a flat pry bar under the damaged shingle and pop the roofing nails
- Remove the cracked or missing shingle completely
- Slide the replacement shingle into position, aligning it with adjacent rows
- Nail through the top edge using four roofing nails per shingle
- Apply roofing cement over each nail head to seal the penetration
- Press down any lifted tabs on neighboring shingles and seal with roofing cement
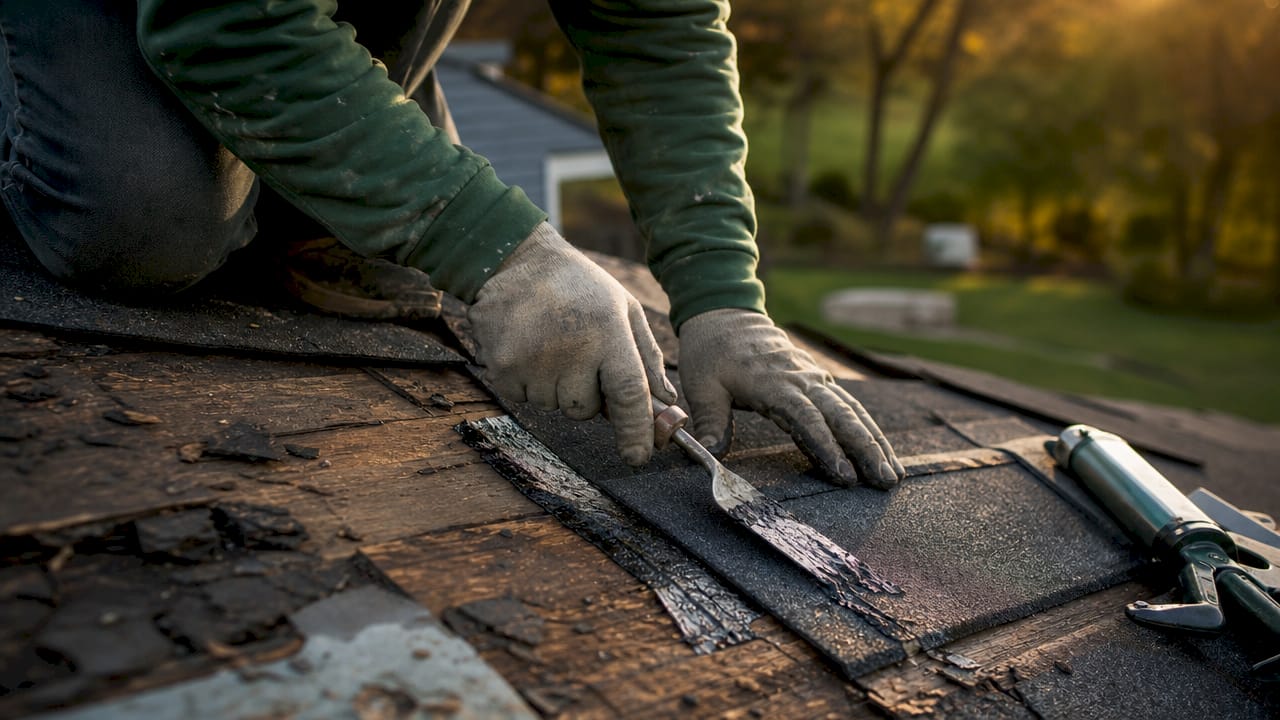
Roofing cement is the workhorse of shingle patching. It seals lifted tabs, fills small cracks, and bonds replacement shingles to the underlayment. Shingle patching is a temporary fix in emergency conditions because the surrounding roof system, including underlayment and decking, may have hidden damage that only a full inspection will reveal. Treat it as a stop-gap, not a solution.
4. Flashing repairs and sealant application for leak prevention
Flashing is the thin metal strip that seals roof penetrations: chimneys, vents, skylights, and valleys. After a storm, flashing is frequently the first point of failure because it relies on both mechanical fastening and sealant adhesion. When flashing lifts or separates, water enters the roof system directly at its most vulnerable points.
Temporary flashing repair centers on two materials: asphalt-based roofing cement and peel-and-stick flashing tape. Silicone-based sealants do not bond well to asphalt shingles and make later professional repairs significantly harder. Asphalt-based flexible cement adheres even on damp surfaces and remains flexible enough to accommodate normal roof movement through temperature changes.
Before applying any sealant, follow these preparation steps:
- Brush away all loose debris, dirt, and old sealant from the repair area
- Dry the surface as much as possible with a rag or heat gun
- Press lifted flashing back into its original position
- Apply roofing cement generously under the flashing and press it firmly down
- Cover the seam with peel-and-stick flashing tape for added waterproofing
Pro Tip: Apply roofing cement in temperatures above 40°F when possible. Cold cement does not spread or bond correctly, which leads to gaps and early failure of the temporary repair.
5. Structural patching and emergency fixes for severe damage
Structural emergency repairs address the most serious damage scenarios: fallen trees, collapsed sections of decking, or sagging rafters. These situations go beyond surface repairs and require stabilizing the roof structure itself before any waterproofing can be effective. Structural storm damage requires emergency tarping plus professional assessment, and temporary covers like plywood can stabilize exposed decking until permanent repair crews arrive.
Walking on a structurally compromised roof is dangerous. Storm-damaged roofing decking may have hidden soft spots that give way without warning, creating a fall-through risk. If you can see visible sagging, splintered rafters, or large sections of missing decking from the ground, call a professional rather than attempting to access the roof yourself.
When structural patching is necessary, here is what temporary stabilization looks like:
- Cover exposed decking with plywood sheets screwed into intact framing members
- Layer heavy-duty tarps over the plywood and secure with the batten method
- Brace any visibly shifted rafters from inside the attic using temporary lumber supports
- Document all visible damage with photos before any temporary work begins
Emergency repairs cost roughly 25% to 50% more than scheduled maintenance, with major structural repairs exceeding $7,500 to $10,000. That premium reflects the urgency, the after-hours labor, and the complexity of working on compromised structures. Knowing this upfront helps you set realistic expectations when you call for help and when you file an insurance claim.
6. Comparing emergency roof repair methods: when to use each
Choosing the right repair type depends on three factors: the severity of the damage, your comfort level working at height, and how quickly permanent repairs can be scheduled. The table below gives you a direct comparison.
| Repair method | Best for | Typical cost | DIY-friendly? | Protection duration |
|---|---|---|---|---|
| Emergency tarping | Any active leak or large exposed area | $200 to $500 | Yes, with care | 30 to 90 days |
| Shingle patching | Isolated missing or cracked shingles | $200 to $600 | Yes, for small areas | Weeks to months |
| Flashing sealant repair | Leaks at chimneys, vents, or valleys | $100 to $400 | Yes, with prep | Weeks to months |
| Structural patching | Fallen trees, collapsed decking, sagging | $1,000 to $10,000+ | No, professional only | Days until full repair |
Insurance documentation is a factor in every emergency scenario. Take photos and video of all damage before you begin any temporary repair. Insurers require evidence of the original damage state, and temporary fixes that obscure the original damage can complicate your claim. Roofwichita’s team assists homeowners with insurance claim documentation as part of every emergency response, which removes one major stressor from an already difficult situation.
Pro Tip: If you are unsure whether damage qualifies as structural, check your attic immediately after the storm. Water stains, daylight visible through the decking, or sagging insulation are signs that the damage goes deeper than the surface.
Key takeaways
Emergency roof repairs are temporary interventions that stop water intrusion and structural deterioration, and every repair type, from tarping to structural patching, requires prompt follow-up with a permanent professional fix.
| Point | Details |
|---|---|
| Tarping is the first line of defense | Use heavy-duty polyethylene tarps with 2×4 battens for 30 to 90 days of protection. |
| Shingle patching suits isolated damage | Replace and seal individual shingles quickly, but schedule a full inspection afterward. |
| Asphalt cement beats silicone for flashing | Asphalt-based sealants bond on damp surfaces and do not interfere with permanent repairs. |
| Structural damage requires professionals | Do not walk on compromised decking. Call a roofer and document everything for insurance. |
| Emergency repairs cost more | Expect to pay 25% to 50% above standard rates due to urgency and complexity. |
What I’ve learned about emergency roof repairs after years in the field
The most common mistake I see homeowners make is treating a temporary fix as a finished repair. A tarp goes up, the rain stops, and suddenly the urgency fades. Two months later, the tarp has ballooned and torn, and the original damage has grown into a much larger problem. Temporary patches stop immediate water intrusion but do not restore the roof system. That distinction matters more than most homeowners realize.
The second mistake is underestimating the physical risk. Most injuries during emergency roof work happen because homeowners move too fast on wet or damaged surfaces. No temporary repair is worth a fall. If conditions are unsafe, wait for a professional or at minimum wait for the rain to stop and the surface to dry.
My honest recommendation: keep a basic emergency repair kit in your garage before storm season hits. A roll of peel-and-stick flashing tape, a tube of asphalt roofing cement, and a heavy-duty tarp sized for your roof section cost under $100 and can save you thousands if you act in the first hour after damage occurs. Pair that with a yearly roof inspection so you know your roof’s condition before an emergency forces the question.
The homeowners who handle roofing emergencies best are the ones who act fast, stay safe, document everything, and call a professional the same day. That sequence, in that order, produces the best outcomes every time.
— Virtual
Get professional emergency roof repair in Wichita fast
When a storm hits and your roof is compromised, Roofwichita responds with experienced crews who know exactly what your home needs. Whether you are dealing with a tree impact, hail damage, or an active leak, the team at Equity Builders Roofing provides prompt tarping, structural stabilization, and full repair services across Wichita and surrounding communities.

Roofwichita also handles insurance claim documentation from the first call, so you are not navigating that process alone. For storm damage roof repair you can trust, or to schedule an emergency inspection, contact Roofwichita today. Do not wait for a temporary fix to fail. Get a permanent solution started now with reliable Wichita roof repair from a team that has protected Kansas homes through every kind of storm.
FAQ
What counts as a true roofing emergency?
A true roofing emergency involves active water intrusion, visible structural failure, or water near electrical systems. Missing shingles without active leaking are urgent but typically not emergencies requiring immediate after-hours response.
How long does an emergency tarp last on a roof?
A properly installed heavy-duty polyethylene tarp secured with 2×4 battens provides 30 to 90 days of protection. Consumer-grade blue tarps degrade in weeks and are not reliable for extended temporary coverage.
Can I do emergency roof repairs myself?
Tarping, shingle patching, and flashing sealant repairs are manageable for most homeowners in safe conditions. Structural damage involving sagging decking or broken rafters requires professional assessment because hidden soft spots create serious fall-through risk.
Will my insurance cover emergency roof repairs?
Most homeowner insurance policies cover emergency repairs caused by sudden storm events. Document all damage with photos before beginning any temporary work, since insurers require evidence of the original damage state to process your claim.
What is the fastest roof leak emergency fix?
Peel-and-stick flashing tape applied over a clean, dry surface stops most active leaks within minutes and works on shingles, flashing seams, and small punctures. Follow up with asphalt roofing cement for a more durable temporary seal.