
Proper roof maintenance after replacement is the single most effective way to protect your investment and extend the life of your new roof. A well-maintained asphalt shingle roof can last 25 to 30 years, but neglect can cut that lifespan nearly in half. The difference comes down to consistent upkeep, timely inspections, and knowing when to call a professional. This guide gives you a practical, season-by-season plan to keep your new roof performing at its best from day one.
How to maintain your roof after replacement: the first steps
The industry term for what you need is a preventive roof maintenance program, and it starts the moment your contractor finishes the job. Most homeowners assume a new roof means no worries for years. That assumption is the most common and costly mistake you can make.
A post-installation inspection within 2 to 4 weeks of project completion is the first non-negotiable step. This window catches improper nailing, poor flashing installation, and ventilation issues before they become structural problems. Catching these defects early preserves your warranty coverage and prevents premature roof failure.
Documentation matters just as much as the physical inspection. Keeping organized records of all warranty documents, inspection reports, and repair receipts protects you when filing insurance or manufacturer claims. Without that paper trail, claims get denied. Start a dedicated folder, physical or digital, the day your roof is installed.
When should you schedule professional roof inspections?
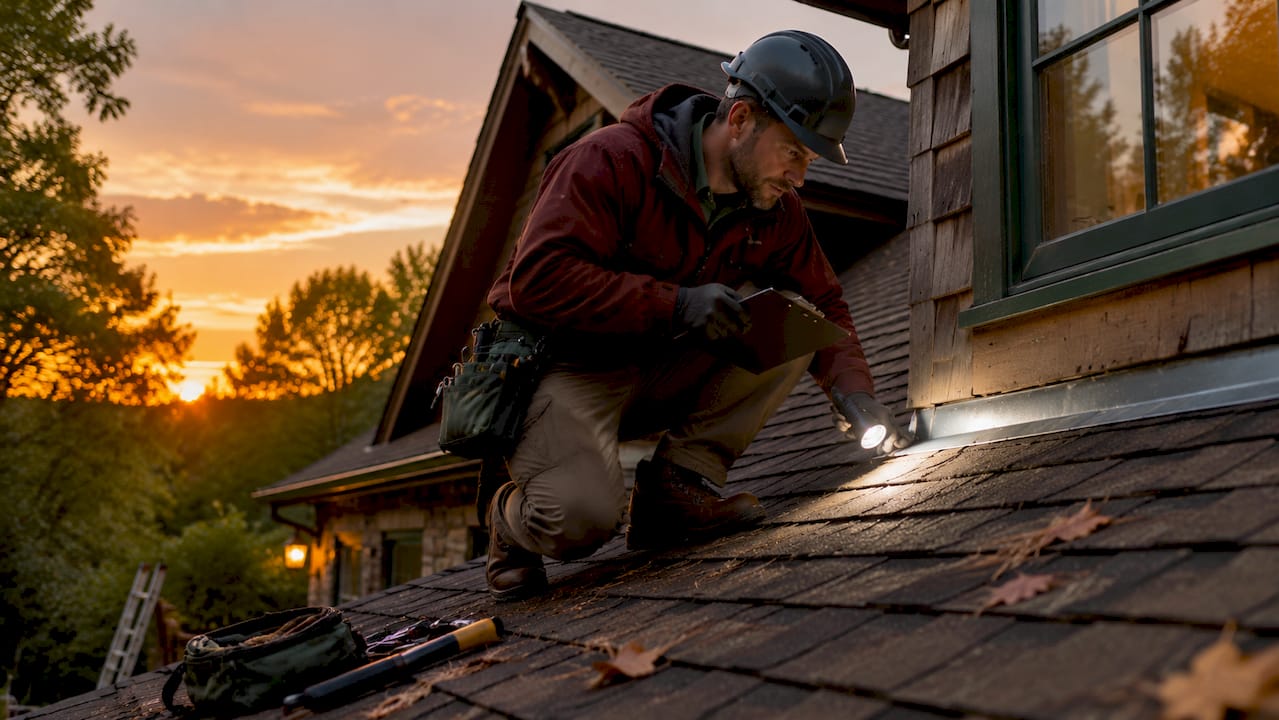
Timing your professional inspections correctly is one of the best practices for roof care that directly affects how long your roof lasts. Follow this schedule:
- 2 to 4 weeks post-installation. Schedule a licensed roofer to review the completed work. They check for improper nailing and flashing defects that are invisible from the ground but can cause leaks within the first year.
- Spring inspection. After winter, a professional looks for ice dam damage, lifted shingles, cracked sealants, and any debris that has worked into the roofing system.
- Fall inspection. This is the most critical seasonal check. A roofer clears problem areas, inspects flashing, and confirms sealants are intact before cold weather arrives.
- After any major storm. Wichita homeowners know hail and high winds are a real threat. Schedule an inspection after significant storm events to document any hail impact or wind damage before filing an insurance claim.
During each visit, a qualified inspector checks shingle condition, flashing integrity around chimneys and vents, gutter attachment, attic ventilation, and any signs of moisture intrusion. Annual professional inspections are recommended at minimum, with twice-yearly visits being the standard for long-term roof health.
Pro Tip: Ask your roofer to provide a written report after every inspection. That document becomes part of your maintenance record and strengthens any future warranty or insurance claim.
What DIY roof upkeep can you safely do yourself?
Routine cleaning and upkeep tasks protect your new roof without requiring you to set foot on it. Safe ground-level maintenance is both practical and effective.
- Visual inspections from the ground. Use binoculars twice a month to scan for lifted, cracked, or missing shingles. You can spot most early warning signs without climbing a ladder.
- Gutter and downspout cleaning. Gutter cleaning frequency depends on your yard: once per year if you have no nearby trees, and up to 3 to 4 times annually with heavy deciduous or pine tree coverage. Clogged gutters back water up under shingles and cause rot. Downspouts must direct water at least 5 feet from your foundation.
- Debris removal. Use a leaf blower or a soft-bristle brush on a long pole to clear leaves and branches from the roof surface. Never use a pressure washer. Pressure washing strips granules from asphalt shingles and accelerates deterioration faster than almost any other DIY mistake.
- Tree trimming. Keep branches trimmed back at least 6 feet from the roof surface. Overhanging limbs deposit debris, scratch shingles during wind events, and give squirrels direct access to your roofline.
- Moss and algae control. If you notice dark streaks or green growth, apply a zinc or copper-based roof treatment from the ground using a garden sprayer. Do not scrub or pressure wash the affected area.
Pro Tip: In winter, use a roof rake from the ground to remove heavy snow accumulation after major storms. Ice dams form when heat escapes through the attic and melts snow that refreezes at the eaves. Removing snow before it melts prevents that cycle entirely.
Which maintenance tasks require a licensed roofer?
Some roof upkeep tasks go beyond what any homeowner should attempt. Knowing where that line sits protects both your safety and your warranty.
- Shingle replacement. Even replacing a single damaged shingle requires matching the existing material, properly sealing the edges, and nailing at the correct angle. An incorrect repair voids the workmanship warranty on surrounding shingles.
- Flashing repair and replacement. Flashing around chimneys, skylights, and roof valleys is the most common source of leaks. Resealing or replacing flashing requires professional tools and knowledge of proper overlap and sealant application.
- Sealing roof penetrations. Pipe boots, vent collars, and HVAC curbs all require periodic resealing. Major repairs involving flashing and sealing must be done by licensed professionals to avoid voiding your manufacturer’s warranty.
- Addressing active leaks. Water stains on ceilings, sagging decking, or visible moisture in the attic are not DIY problems. These are signs requiring immediate repair from a qualified contractor.
- Ventilation corrections. Attic ventilation and insulation are critical to preventing internal heat buildup and ice damming. Adjusting ridge vents, soffit vents, or attic insulation requires a professional assessment to get the balance right.
When hiring for any of these tasks, choose a contractor with verifiable local references and a written workmanship guarantee. A reliable roofing company provides documentation of every repair, which feeds directly back into your maintenance record.
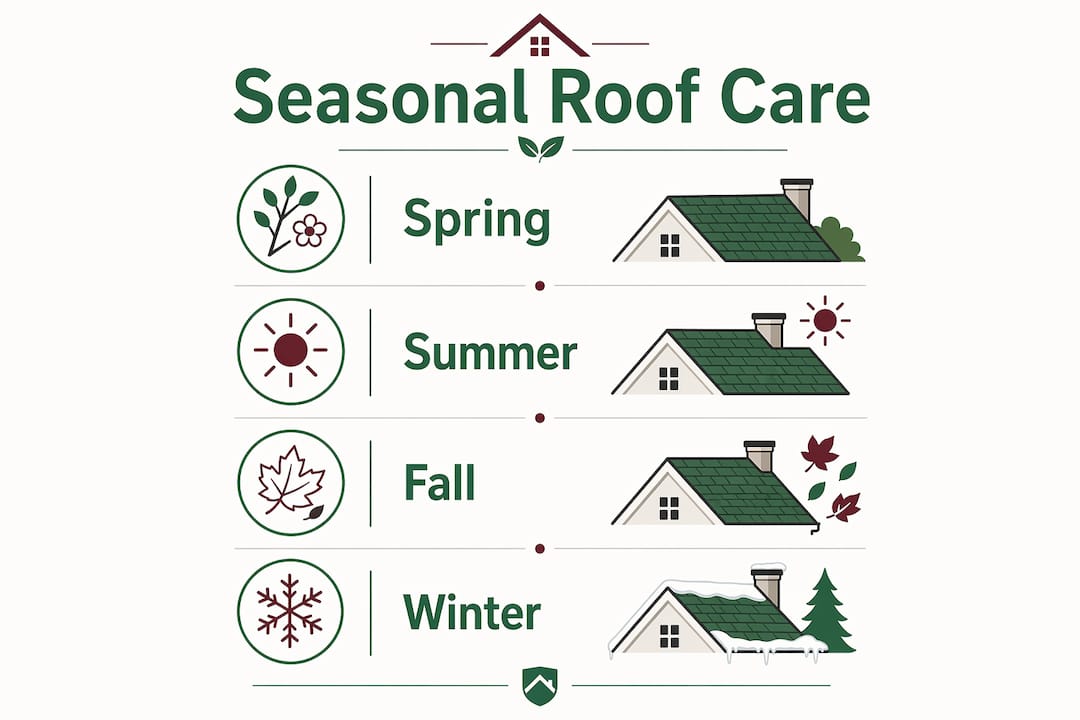
Seasonal roof maintenance checklist for year-round protection
A structured seasonal approach is the most practical way to care for a new roof over the long term. Here is what each season demands.
| Season | Key Tasks |
|---|---|
| Spring | Inspect for winter damage, check for lifted or cracked shingles, clean gutters and downspouts, look for moss or algae growth, confirm attic ventilation is unobstructed |
| Summer | Schedule any planned professional repairs, treat moss or algae, check attic insulation for heat buildup, trim overhanging branches |
| Fall | Clear all leaves from gutters and roof surface, inspect and reseal flashing, check pipe boots and vent collars, confirm downspout drainage direction |
| Winter | Monitor for ice dam formation at eaves, use a roof rake for heavy snow removal from the ground, avoid walking on the roof in freezing conditions |
Fall is the most critical season for roof preparation because winter weather amplifies every small defect. A cracked sealant in October becomes a leak by January. A partially clogged gutter in November becomes an ice dam by February.
Keep a simple maintenance log. Record the date, the task performed, and any observations. Note loose granules in gutters, which are normal shortly after installation but should taper off within a few months. Note any sounds or visual changes. This log becomes your most valuable document when a warranty or insurance situation arises.
Pro Tip: Set calendar reminders in March and October for your biannual professional inspections. Scheduling in advance means you get on the contractor’s calendar before the seasonal rush, and your roof gets attention before weather conditions change.
Key takeaways
Consistent, documented maintenance is the single most effective way to extend your new roof’s lifespan and protect your warranty.
| Point | Details |
|---|---|
| Inspect within 2 to 4 weeks | Schedule a professional inspection immediately after installation to catch workmanship defects early. |
| Clean gutters regularly | Clear gutters up to 4 times per year depending on tree coverage to prevent water backup and rot. |
| Avoid pressure washing | Use soft washing or a brush instead; pressure washing strips granules and shortens shingle life. |
| Document everything | Keep all inspection reports, repair receipts, and warranty documents to support future claims. |
| Fall prep is non-negotiable | Inspect flashing, clear gutters, and reseal penetrations every fall before winter weather arrives. |
What I’ve learned from watching homeowners skip the basics
After years of working with Wichita homeowners on roof replacements and repairs, the pattern is consistent. Homeowners who invest in a new roof feel a sense of relief and then stop paying attention. That relief is understandable, but it is exactly when the small problems begin.
The 2 to 4 week post-installation window is the one most homeowners skip entirely. They assume the contractor did everything right. Most of the time, that is true. But catching a misaligned piece of flashing or an under-driven nail at week three costs almost nothing to fix. Catching it at year three, after water has worked into the decking, costs thousands.
I have also seen well-meaning homeowners pressure wash their new shingles to keep them looking clean. That single mistake strips the granule layer that protects the asphalt beneath, and it voids most manufacturer warranties on contact. Soft washing and gentle debris removal are all you need.
The other misconception worth addressing directly: not every noise or change after a new roof is a problem. Minor settling sounds and loose granules in gutters during the first few months are normal. Shingles settle, materials expand and contract, and granule shedding slows down over time. What is never normal is an active leak, a water stain on your ceiling, or a visible sag in the roofline. Those require a call the same day, not a wait-and-see approach.
The homeowners who get 28 to 30 years out of an asphalt shingle roof are not doing anything extraordinary. They schedule their spring and fall inspections, keep their gutters clean, trim their trees, and call a professional the moment something looks wrong. That is the entire system.
— Virtual
Protect your Wichita roof with professional support

A new roof is one of the largest investments you will make in your home. Roofwichita, the team at Equity Builders Roofing, provides professional roof inspections in Wichita to keep your new roof performing at its best season after season. From post-installation checks to storm damage assessments and full roof repair services, the team handles every maintenance need with documented, warranty-safe workmanship. Roofwichita also assists Wichita homeowners with insurance claim filing to make sure your maintenance records work for you when it counts. Schedule your inspection today and protect the roof you just invested in.
FAQ
How soon after replacement should you inspect a new roof?
Schedule a professional inspection within 2 to 4 weeks of installation. This window catches workmanship defects like improper nailing or poor flashing before they cause water damage.
How often should gutters be cleaned on a new roof?
Clean gutters at least once per year if no trees are nearby, and up to 3 to 4 times annually with heavy tree coverage. Clogged gutters are one of the leading causes of premature roof damage.
Can you pressure wash an asphalt shingle roof?
No. Pressure washing strips the protective granule layer from asphalt shingles and voids most manufacturer warranties. Use soft washing or a soft-bristle brush for cleaning instead.
What signs after a new roof installation require immediate attention?
Active leaks, water stains on ceilings, sagging decking, and misaligned shingles all require same-day professional attention. Loose granules in gutters and minor settling sounds during the first few months are normal.
How do you document roof maintenance for warranty purposes?
Keep a dedicated file with all warranty documents, inspection reports, and repair receipts. Lack of documentation is the most common reason warranty and insurance claims are denied.